


Table of contents
- 🔶 Requirements
- ⚡Step 1: Set up and log into your AWS account
- ⚡Step 2: Launch an Amazon EC2 instance in any region.
- ⚡Step 3: Configure your instance
- 1. Choosing Application and OS Images (AMI) Amazon Machine Image
- 2. Choosing Instance Type
- 3. Create key pair
- 4. Network settings
- 5. Configure storage
- 6. Advanced details
- 7. Reviewing Instance Launch
- ⚡Step 4: Connect the EC2 instance through Gitbash
- ⚡Step 5: Delete or terminate the EC2 instance
- 🎉Congratulations!
👋 Hello Everyone!
Today we will learn, How to create a Linux instance using our AWS account. Although we have seen how we can create Linux instances from the AWS account and connect with a 🔗 browser-based client from the Amazon EC2 console. So, there are a few steps through which you can launch your instance within a few minutes and then we will learn how to connect the EC2 instance through Gitbash.
🔶 Requirements
🔑 SSH Key (.pem file) provided by Amazon: This SSH key is provided by Amazon when you launch the instance.
IP address: Public IP address assigned to your EC2 instance.
Security Group associated with the instance Ports: 22 Protocol: TCP
Username: The username depends on the Linux distro you just launched. Usually, these are the usernames for the most common distributions:
-Ubuntu: ubuntu
-Amazon Linux: ec2-user
-Centos: root
You can launch a Linux instance using the AWS Management Console as described in the following procedure.
⚡Step 1: Set up and log into your AWS account
Log into the AWS Management Console as the root account or IAM user.
Click on services --> compute --> EC2

⚡Step 2: Launch an Amazon EC2 instance in any region.
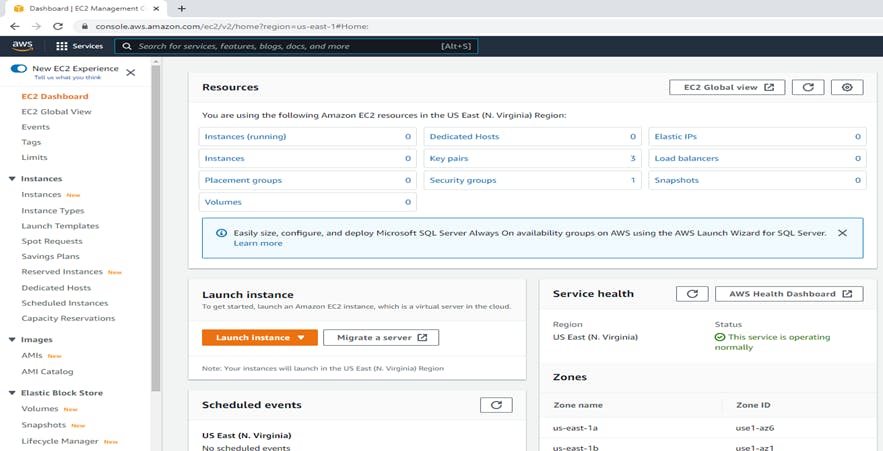
In the Amazon EC2 Dashboard, choose "Launch Instance" to create and configure your virtual machine. In the navigation bar at the top of the screen, the current Region will display. Here I have selected US East (N.Virginia)
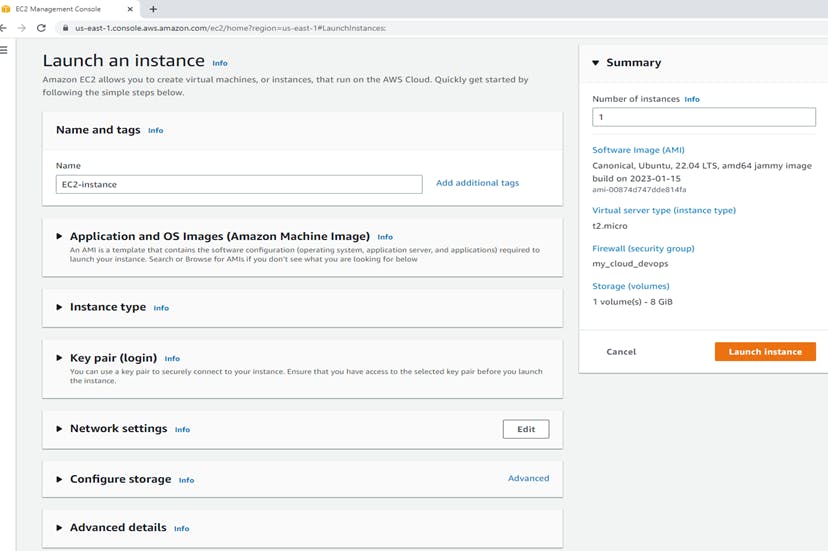
⚡Step 3: Configure your instance
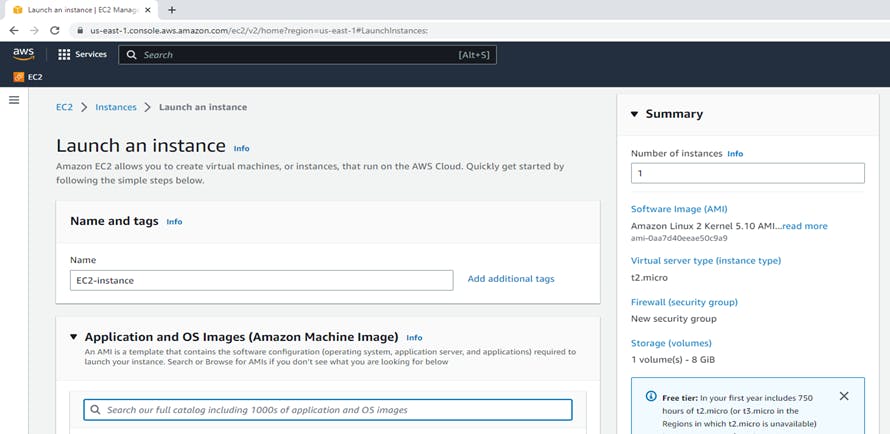
In the Launch an Instance wizard, Amazon EC2 allows you to create virtual machines or instances that run on the AWS cloud. So, we are giving the name "EC2-instance".

Process for launching an instance:
1. Choosing Application and OS Images (AMI) Amazon Machine Image
When you launch an instance, you must select a configuration, known as an Amazon Machine Image(AMI).
An AMI is a template that contains the software configuration (operating system, application server, and applications) required to launch your instance. You can select an AMI provided by AWS, our user community, or the AWS Marketplace; or you can select one of your own AMIs.
you can either select an AMI from the list, or you can select a Systems Manager parameter that points to an instance AMI ID.
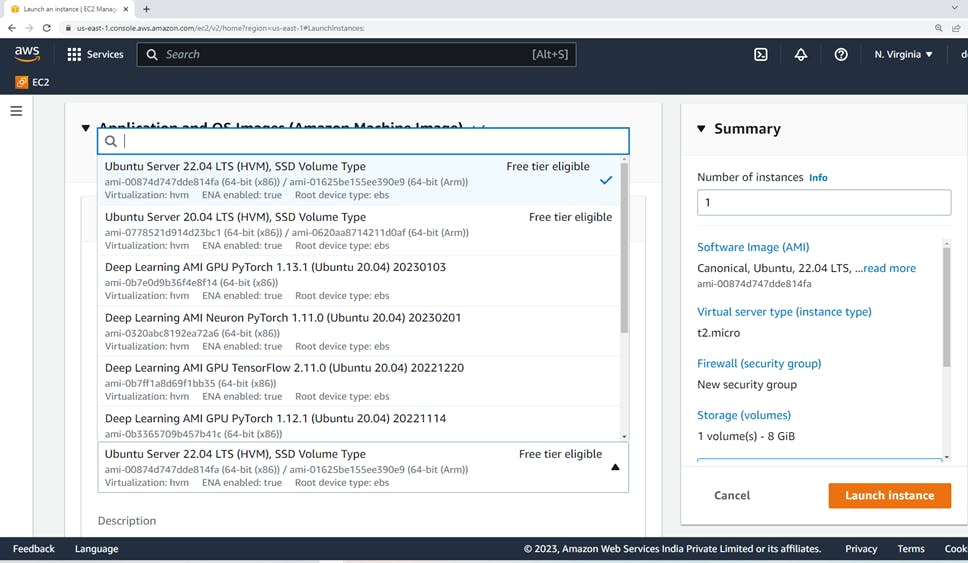
On the Choose an Amazon Machine Image (AMI) page, use one of two options to choose an AMI.
Either search the list of AMIs or search by the Systems Manager parameter.
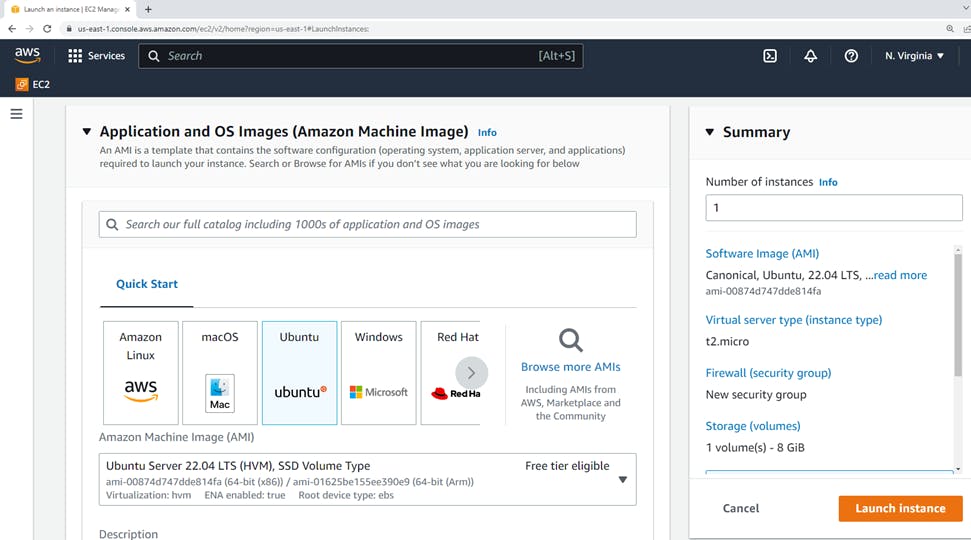
Here we have selected Ubuntu Server 22.04 LTS(HVM). It is "Free tier eligible"
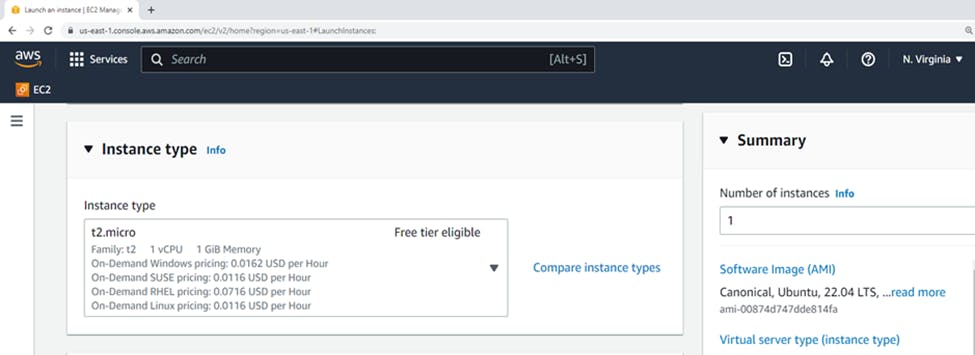
2. Choosing Instance Type
On the Choose an Instance Type page, select the hardware configuration and size of the instance to launch.
Larger instance types have more CPU and memory.
By default, the wizard displays current generation instance types and selects the first available instance type based on the AMI that you selected.
Choose an Instance Type page, you can select the hardware configuration of your instance. Select the t2.micro instance type, which is selected by default. The t2.micro instance type is eligible for the free tier. In some regions where t2.micro is unavailable, you can use a t3.micro instance under the free tier. For more information, see AWS Free Tier.
3. Create key pair
A key pair, consisting of a public key and a private key, is a set of security credentials that you use to prove your identity when connecting to an Amazon EC2 instance. Amazon EC2 stores the public key on your instance, and you store the private key.
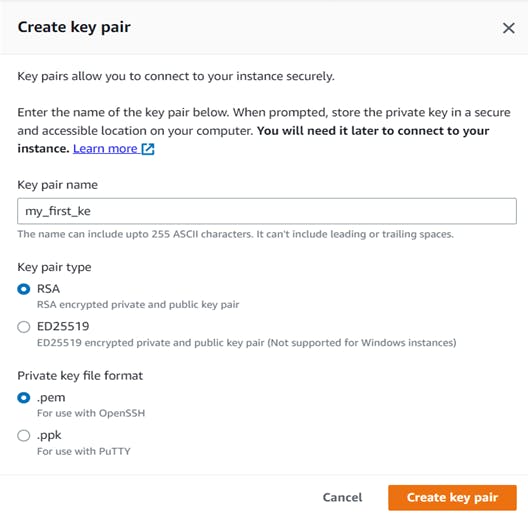
so we have created the key pair "my_first_key.pem"
After creating a key pair make sure that u can save it properly for future reference.
4. Network settings
VPC (Virtual Private Cloud) – allows you to create a virtual network in AWS
The subnet in VPC (a key component in VPC)
Internet Gateway in VPC (allows communication between your VPC and the internet)
Route table (data file in RAM that is used to store route information about directly connected and remote networks)
Security group (acts as a virtual firewall)
Network ACL (an optional layer of security for your VPC)
Assign a security group – Select create a new security group.
Security group name – Name of the group. Ex: "my_cloud_devops"
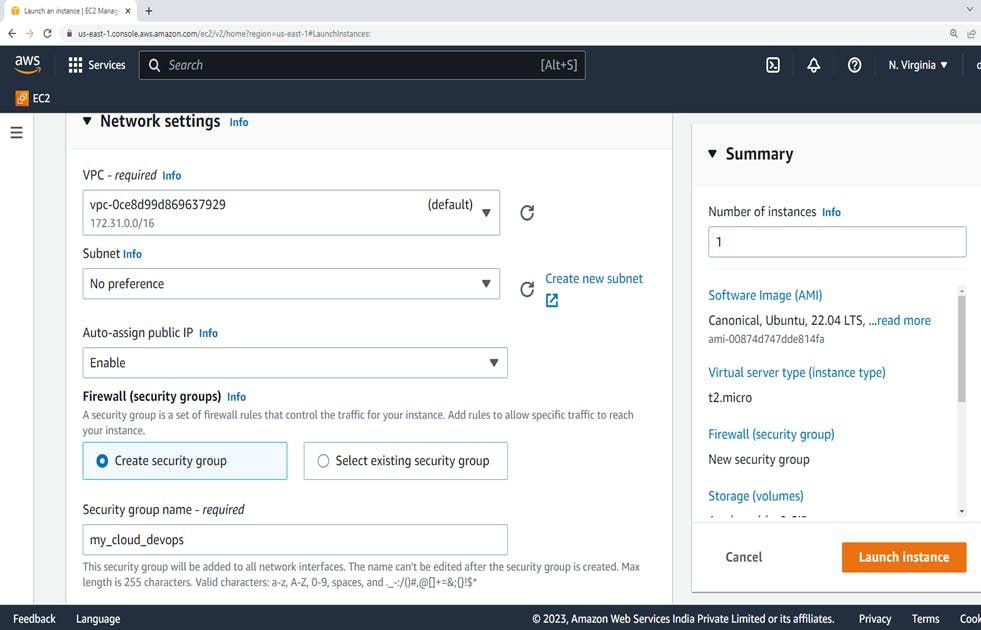
The security group name "my_cloud_devops"
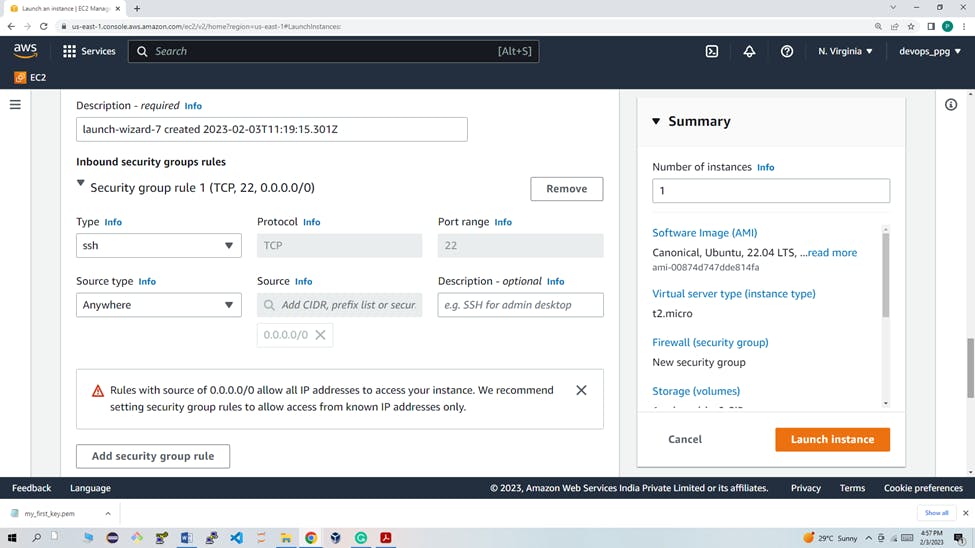
Set the rule for SSH, by selecting or setting the following values. They allow inbound SSH connections from all sources (any IP address).
Type: SSH, Protocol: TCP, Port Range:22, Source: Custom 0.0.0.0/0, Description: Accept SSH connections from all sources
if you want to add another rule use again source type. Create some rules that allow inbound HTTP and HTTPS connections from all sources. Click on Add Rule button.
Type: HTTP, Protocol: TCP, Port Range: 80, Source: Custom 0.0.0.0/0, Description: Accept unencrypted HTTP connections from all sources
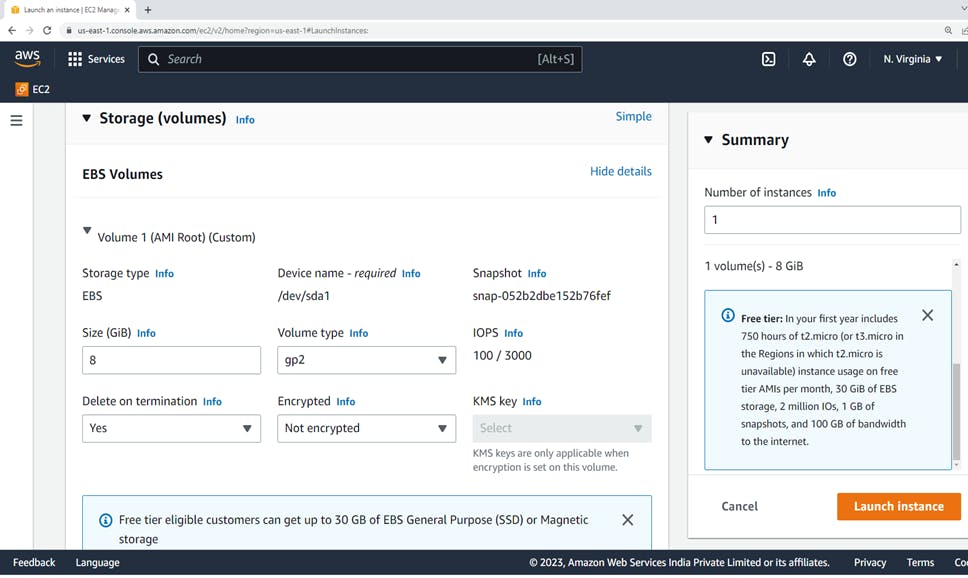
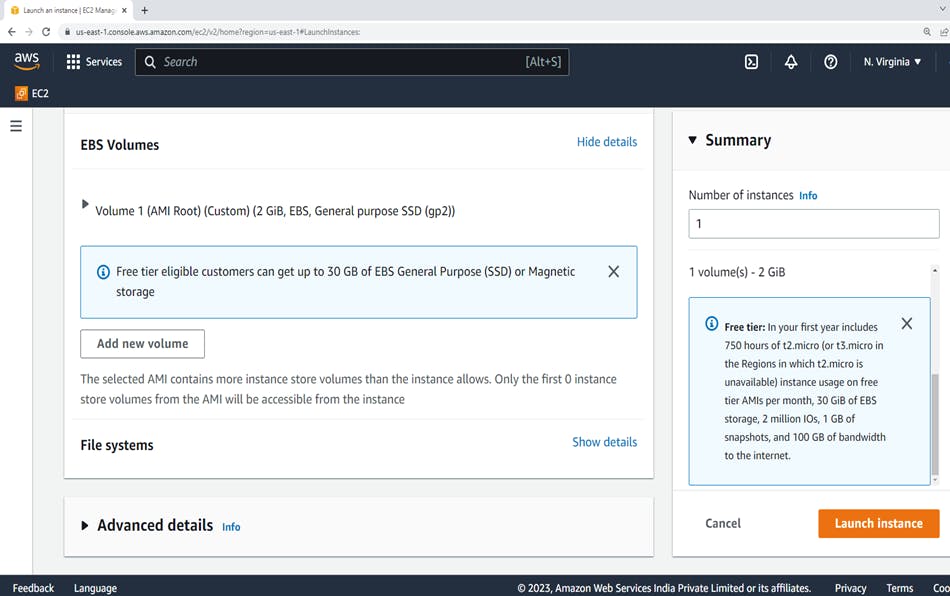
5. Configure storage
On the Configure storage, you can specify additional volumes to attach to the instance by choosing Add New Volume.
Configure each volume as follows.
Type: Select instance store or Amazon EBS volumes to associate with your instance.
Device: Select from the list of available device names for the volume.
Snapshot: Enter the name or ID of the snapshot from which to restore a volume.
Size: For EBS volumes, you can specify a storage size.
Volume Type: For EBS volumes, select a volume type.
IOPS: If you have selected a Provisioned IOPS SSD volume type. You can enter the number of I/O operations per second (IOPS) that the volume can support.
Delete on Termination: For Amazon EBS volumes, select this check box to delete the volume when the instance is terminated.
Encrypted: If the instance type supports EBS encryption, you can specify the encryption state of the volume.
6. Advanced details
The User data field is located in the Advanced details section of the launch instance wizard. Enter your shell script in the User data field.
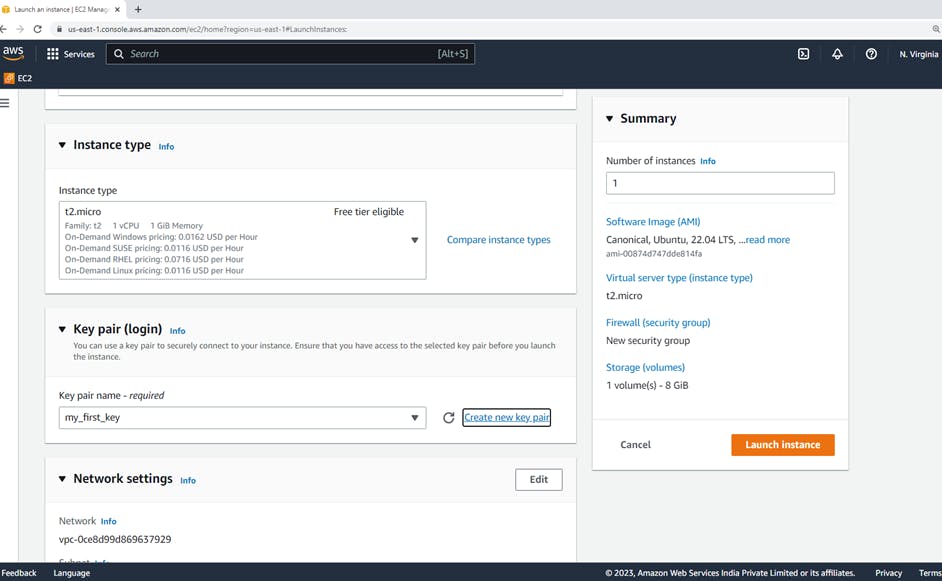
7. Reviewing Instance Launch
On the Instance Launch, check the details of your instance.
Then, make any necessary changes by choosing the appropriate Edit link.
Then, choose Launch.
To launch your instance, select the acknowledgment check box.
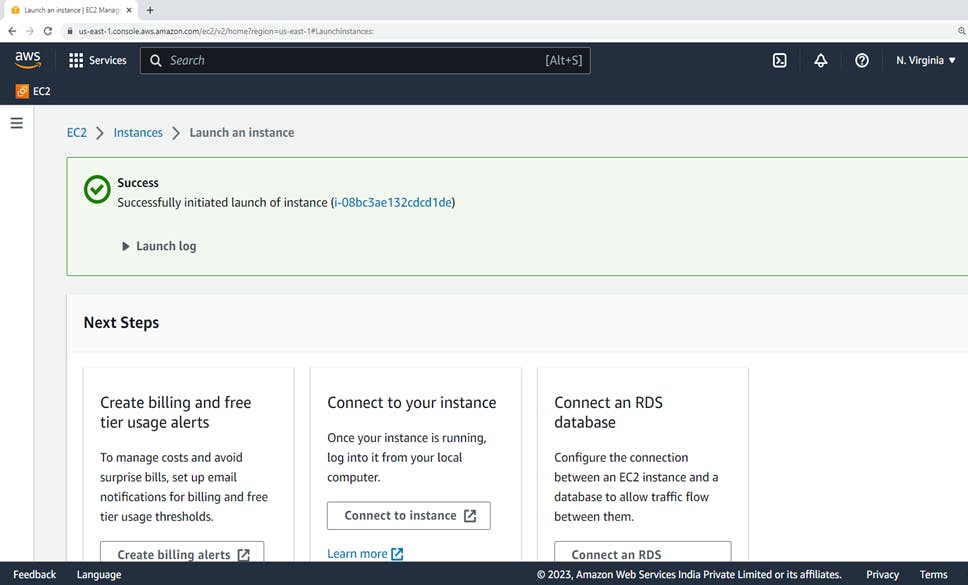
Finally, choose Launch Instances.
we have successfully created an EC2 instance.
⚡Step 4: Connect the EC2 instance through Gitbash
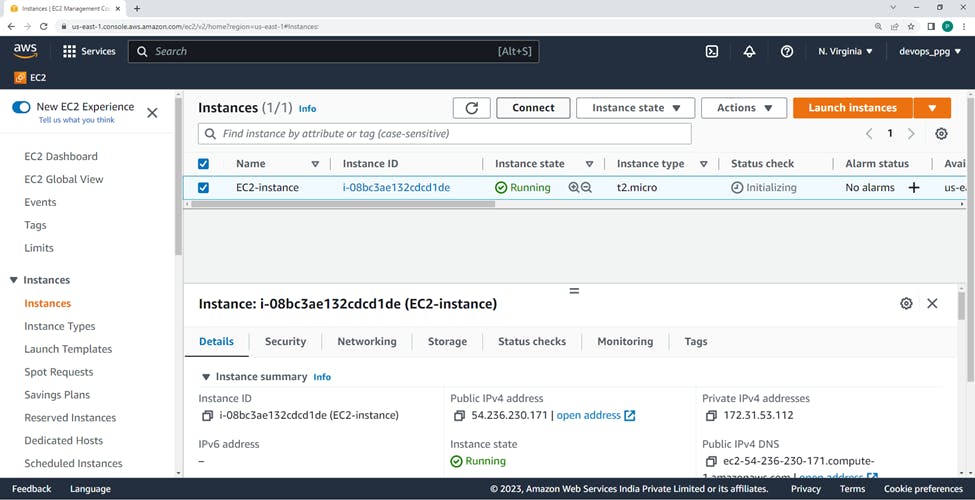
After successfully running the instance select the instance and click on "Connect"
After you launch your instance, you can connect to it and use it. To begin, the instance state is pending. When the instance state is running, the instance has started booting. There might be a short time before you can connect to the instance.
Now, we want to connect the EC2 instance through gitbash we need to download that software click on below git bash icon or 🔗click here to download Gitbash
Go to the root directory where you have kept your AWS key which is "my_first_key"
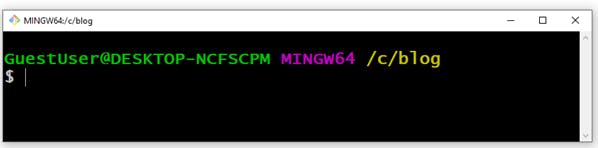
So, I have stored my keypair in the blog folder, just right click and you will see Gitbash here Option

Git bash window will open...
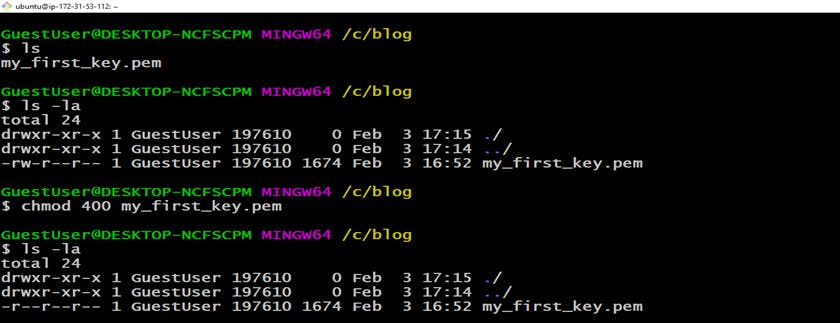
📌 In this demonstration, the pem file is stored in the blog folder, and with the help of
ls command we can list all files in the blog folder.
ls
📌 ls -la
-l : Displays entries in a long list format.
-a : Lists all files including those that begin with .
ls -la
📌 chmod 400 my_first_key.pem
You need to set read-only permissions for security reasons.
Use 400 if the keys must be only readable by you.
chmod 400 my_first_key.pem
📌 ls -la with this command, you can again check whether file permission has changed or not.
ls -a
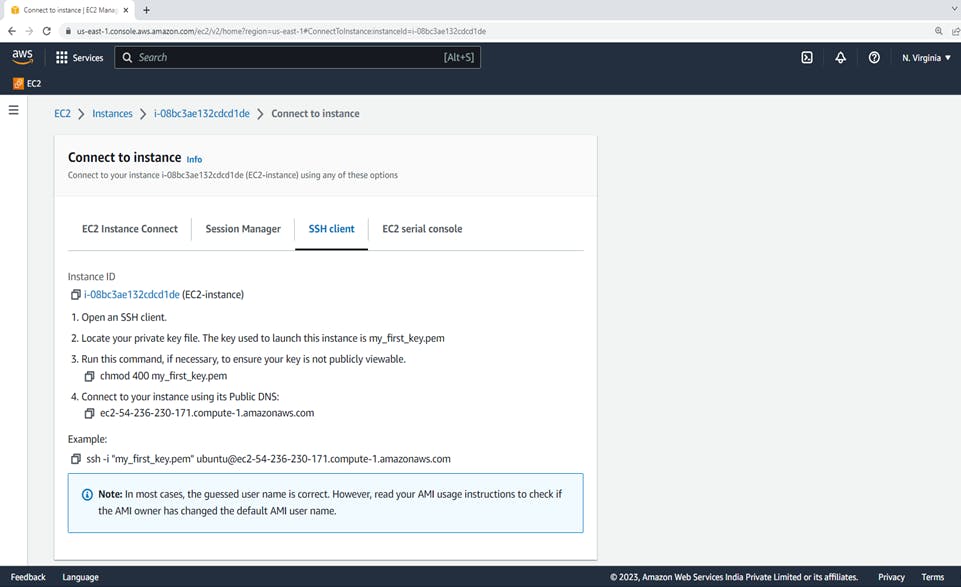
📌 Now you can connect to AWS EC2 instances via SSH from your Linux machine with the command:
Type the SSH command with this structure:
ssh -i my_first_key.pem ubuntu@54.236.230.171
This is the explanation of the previous command:
ssh: Command to use SSH protocol
-i: Flag that specifies an alternate identification file to use for public key authentication.
username: Username that uses your instance
ip-address: IP address given to your instance
After pressing enter, a question will prompt you to add the host to your known_hosts file. Type yes. This will help to recognize the host each time you’re trying to connect to your instance.
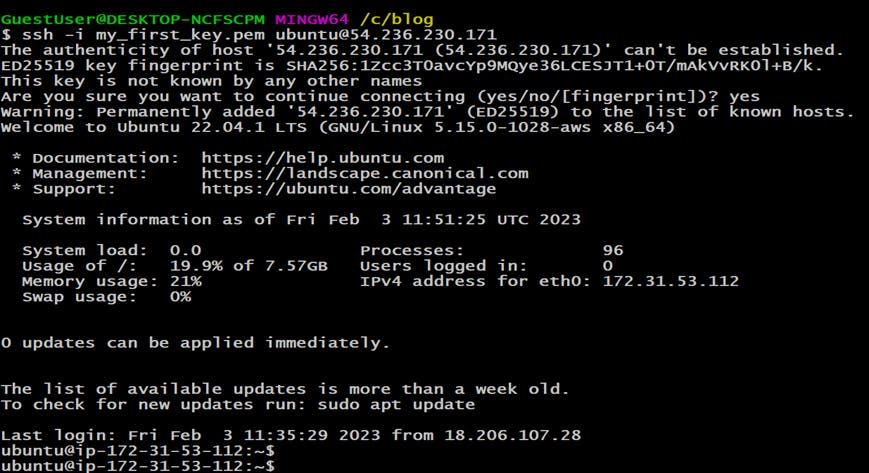
🔥🔥🔥 And that’s it! Now you’re logged in on your AWS instance
⚡Step 5: Delete or terminate the EC2 instance
📢 If u don't need an instance you can stop Instance or Terminate the instance.
Pay-as-you-go cloud computing (PAYG cloud computing) is a payment method for cloud computing that charges based on usage.
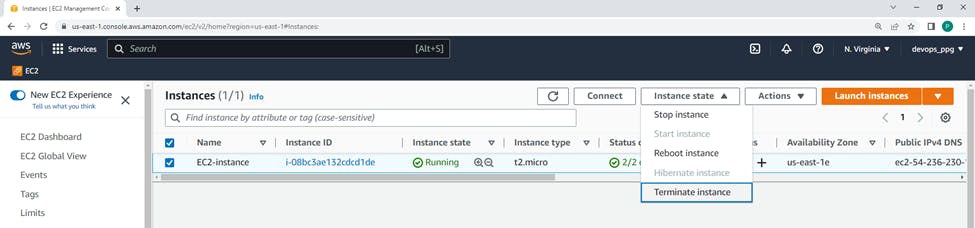
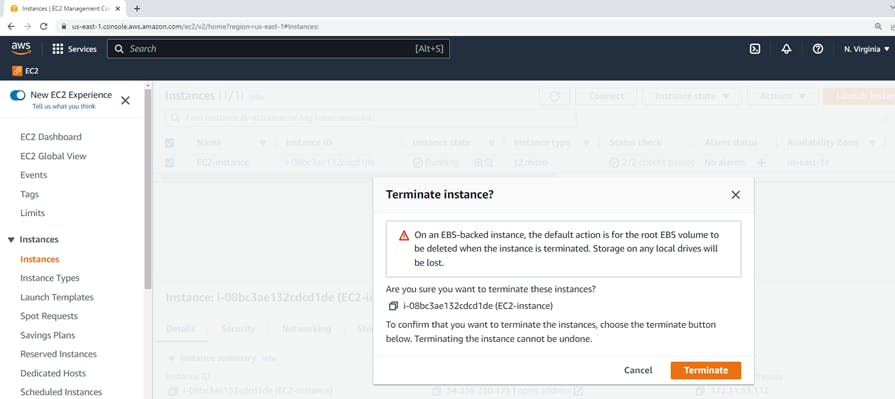
click on Terminate Instance --> dialog box will appear, to confirm that you want to terminate the instance.
🎉Congratulations!
You have learned how to create an EC2 instance and connect through Gitbash. Also, you have learned a few Linux commands just as ls, ls -la and how to change file permission. I hope you enjoyed reading the article.
So it can be beneficial to do some research and find the opportunities that can be most helpful in building your career & becoming a part of the cloud computing world.
If you enjoyed this article, share it with your friends and colleagues!